Adobe Firefly to Printful: How I Designed a Tote Bag and What It Really Earns
In this video I make a tote bag design with Adobe Firefly, add text to it in Adobe Express, and turn it into a Printful product for my WooCommerce store. Then I check what I really earn from it, because the number Printful shows you is not the real profit.
I have a children’s book series, and I’m adding products to the books’ website so kids can buy more things they connect with. A tote bag is a bag for books, and this design gives the feeling of the books, with the Colorado mountains where the stories take place.
Step 1: Choose a bag that ships everywhere
In Printful, click Product catalog in the left menu, then Accessories → Bags → Tote bags.
The first bag I opened, a cotton tote, said it was unavailable in my region. On its Shipping tab the only countries were Australia and New Zealand. So before you design anything, open the Shipping tab and check that the product ships to the countries you sell to. Otherwise you may only find out after someone orders it.
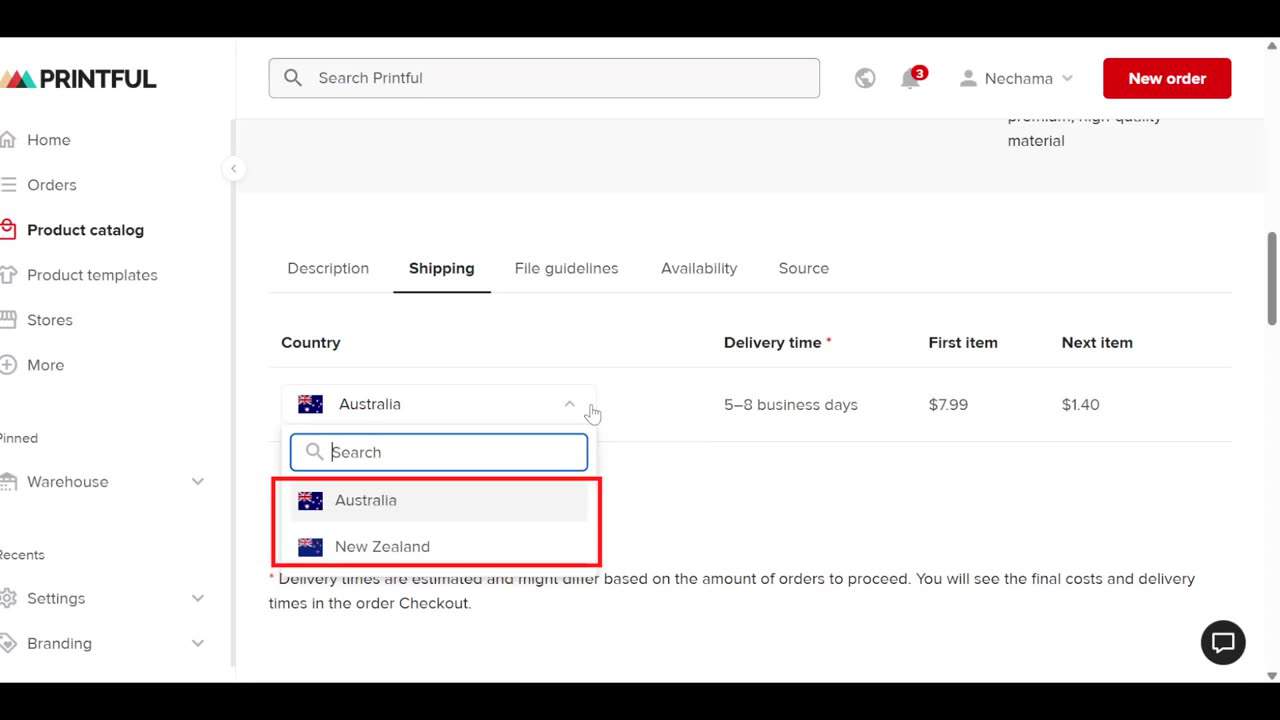
I chose the Eco Tote Bag instead. It costs $14.75.
Step 2: Check the file guidelines first
Click File guidelines. The print area is a square of about 24 × 24 cm, and the file must be PNG or JPEG with at least 150 DPI.
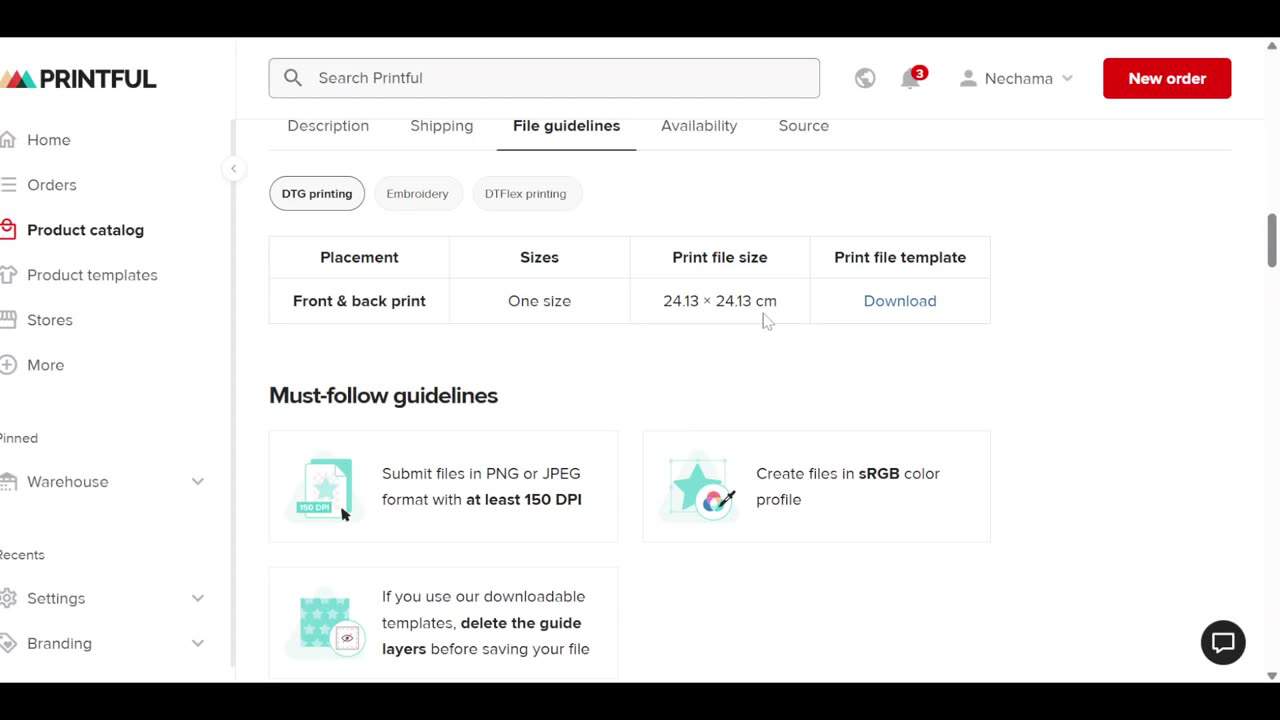
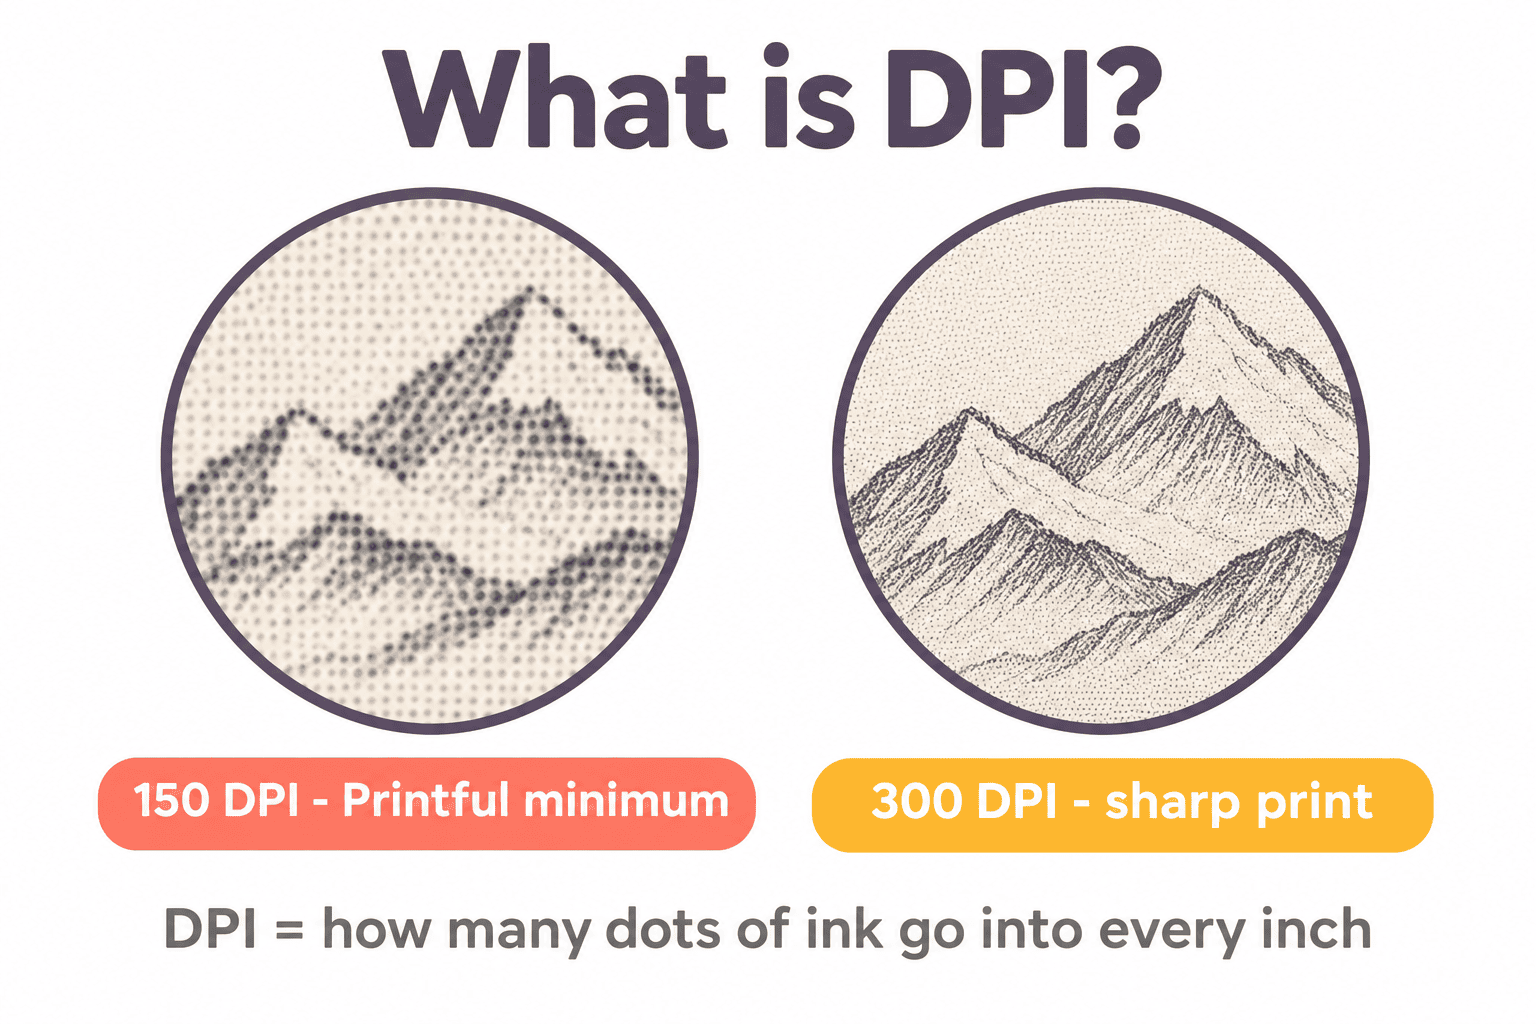
DPI means how many dots of ink go into every inch. More dots means a sharper print. In simple numbers: 24 cm is about 9.45 inches, so at 150 DPI you need an image of at least about 1,420 pixels wide, and for a really sharp print (300 DPI) about 2,835 pixels. That’s why the design has to be a big image.
Print size and DPI checker
Is your image big enough to print? Choose the product (or type the print area), then type your image size in pixels.
Step 3: Generate the drawing in Adobe Firefly
- In Firefly, click Image → Generate image in the left menu.
- Click the model name under the prompt box and choose a model. You can also use models from other companies there, like GPT and Gemini. I used Adobe’s own Firefly Image 5, which Adobe marks as commercially safe.
- To get the same pencil style as my book drawings, I clicked the + next to References → Your device and uploaded one of my drawings.
- My prompt: a loose pencil sketch of an open book, with mountains, pine trees, a small cabin and a trail coming out of its pages. No text, no color, no frame.
Aspect ratio was stuck on Auto, so I couldn’t choose a square. The first result was a tall rectangle with the drawing only at the bottom, and only 624 pixels wide. Writing “square image” at the start of the prompt helped: the drawing filled more of the image.
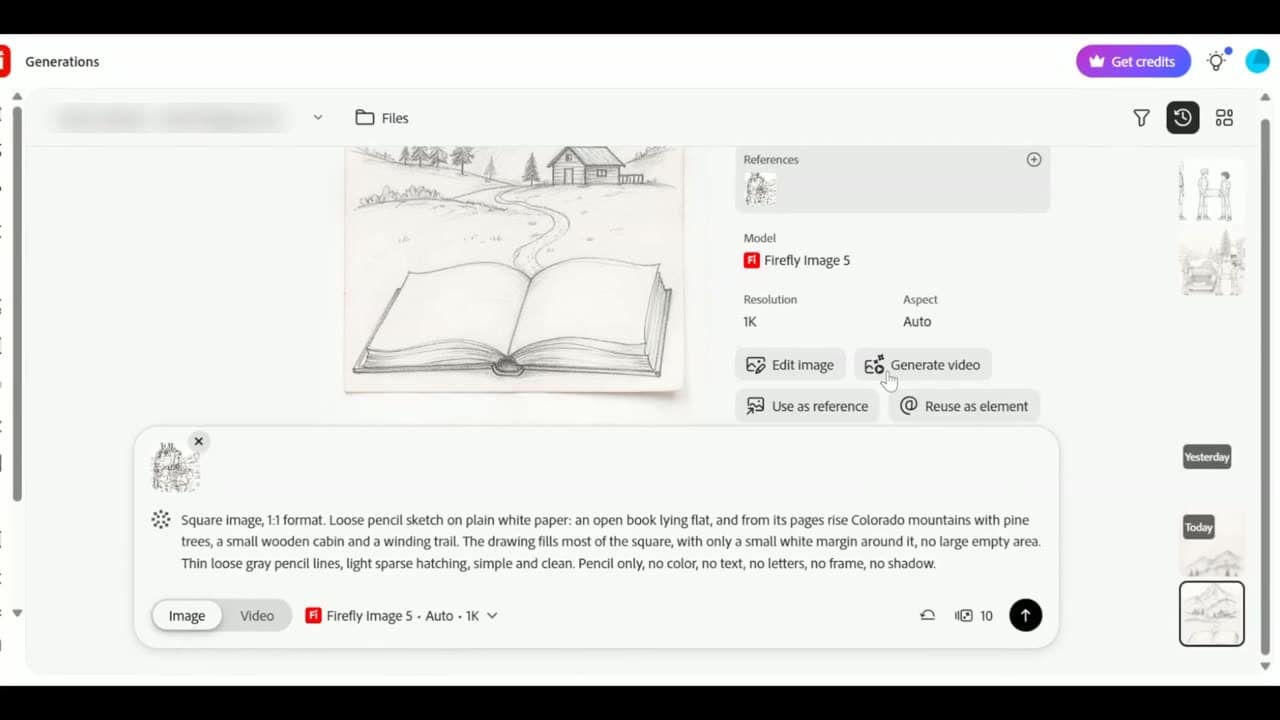
The drawing came with a beige paper background, and that’s how it will print. On a bag that comes in several colors, a design with its own background actually stands out on every color. If you want white, ask for a white background in the prompt.
Step 4: Upscale in Firefly
Click Edit image. I tried Remove background, but because the drawing isn’t on pure white paper it only removed the edges. Then I clicked Upscale, chose 4×, and the image became 3328 × 4992 pixels. You can upscale again if you need it even bigger.
Click Download. It downloads as a JPG, so the removed edges turn black (a JPG can’t keep a transparent background). I cropped them away in the next step.
Step 5: Add the text in Adobe Express
- Start a new square design, click Upload → Upload from device and choose the Firefly image.
- Click Crop at the top, drag the edges until the black is gone, and click Done. Then drag a corner so the drawing fills the page.
- Click Text in the left bar and type your text. I wrote “Just One More Chapter” in the Adso font, bold, dark gray with a gray outline, to match the pencil.
- Drag the text to the center. The pink line shows you when it’s in the middle.
- Click Download → PNG and move the Size slider to 3×. My file came out 3240 × 3240 pixels. (This is a Premium option.)
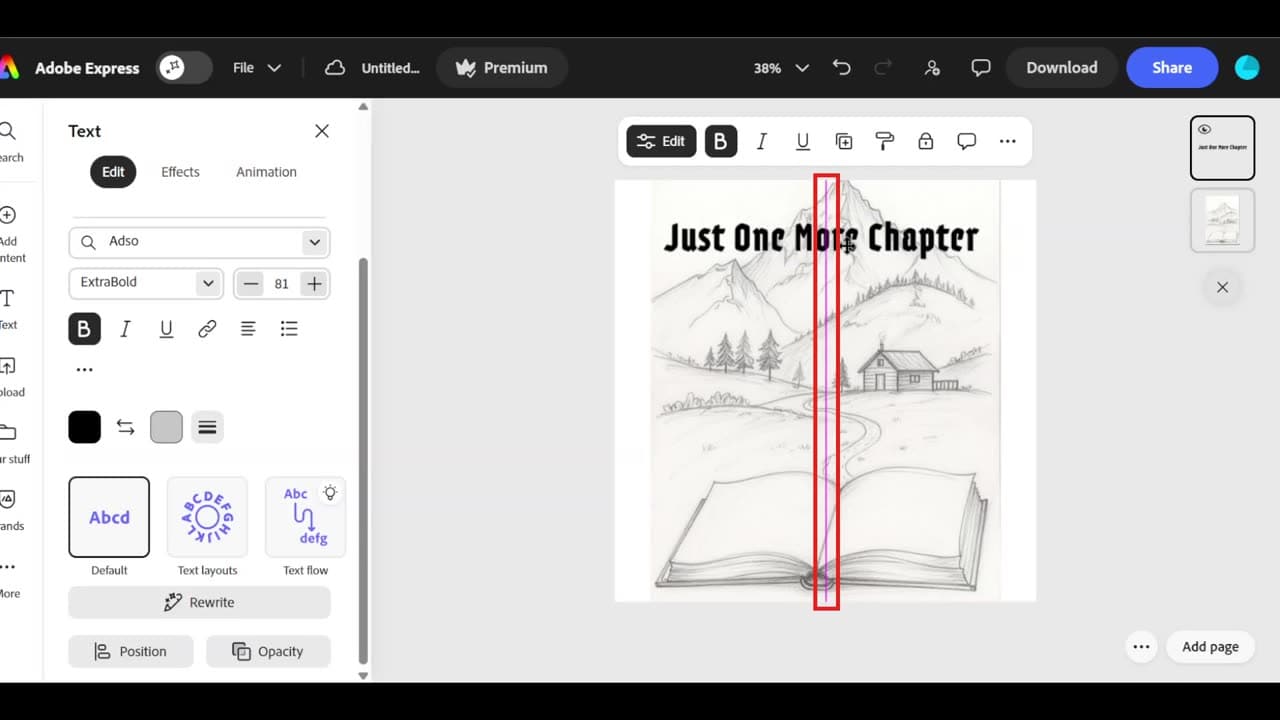
You could also take the drawing straight from Firefly to Printful and add text with Printful’s own text tool. I used Express because it lets you change more things.
Step 6: Make the product in Printful
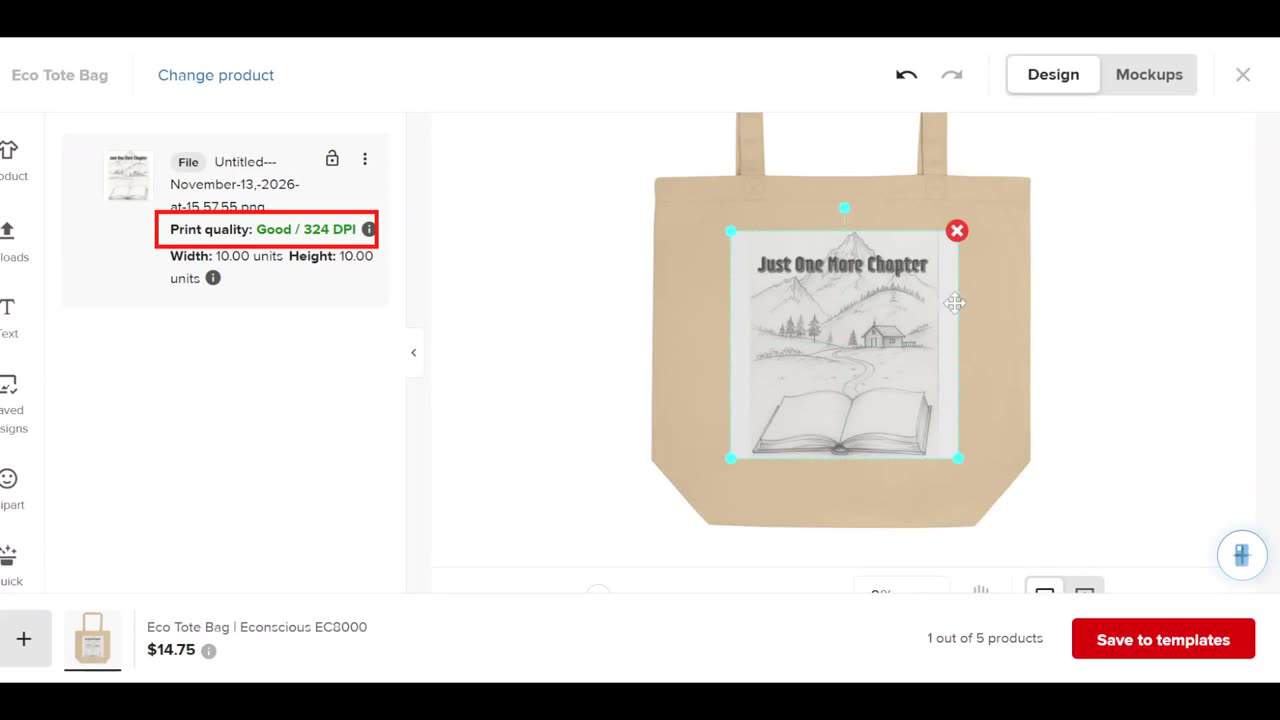
- On the Eco Tote Bag, click Create product template → Upload, choose the PNG and click Apply.
- Print quality showed Good, 324 DPI, much more than the 150 Printful asks for.
- When I made the design bigger, Printful warned that part of it was outside the print area, so I made it a little smaller until it fit.
- Click Save to templates, then Add to store, choose your store and the bag colors (I kept all four).
- Click Proceed to mockups → Basic mockups → Choose mockups. I chose the bag on a model as the main image.
- Write the title and description (you can write them with AI) and click Continue.
Step 7: The price, and the real profit
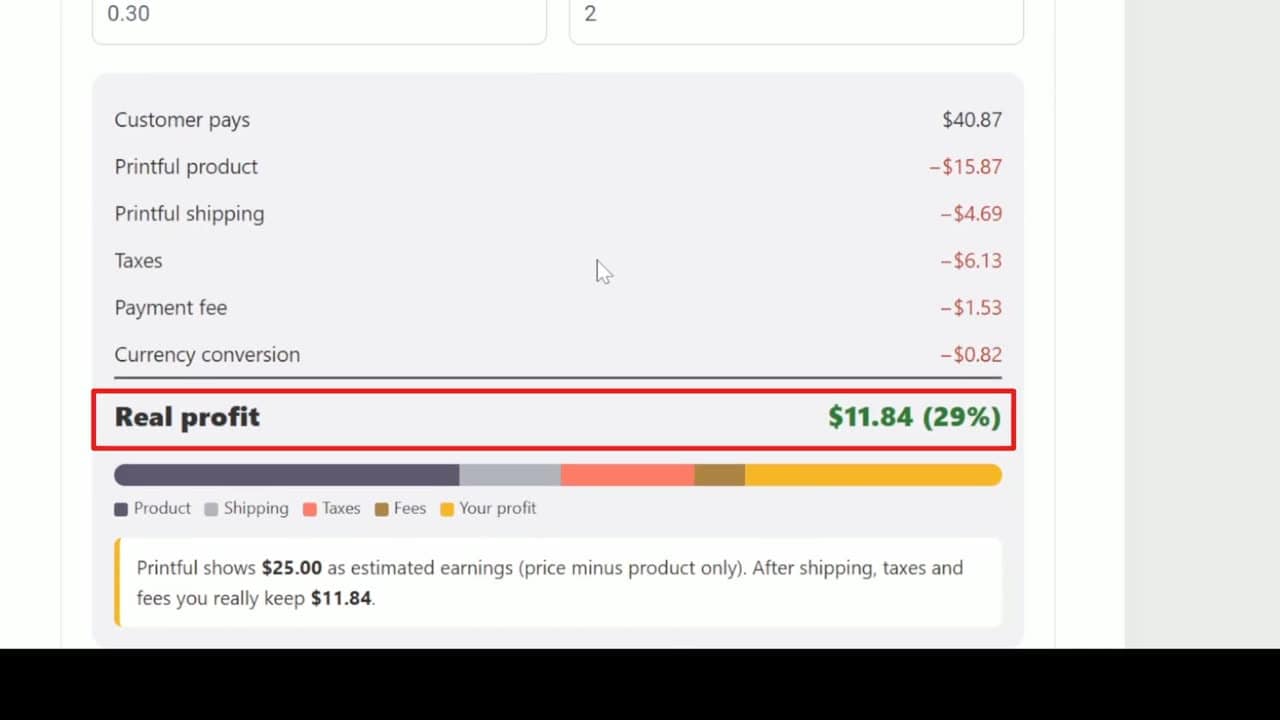
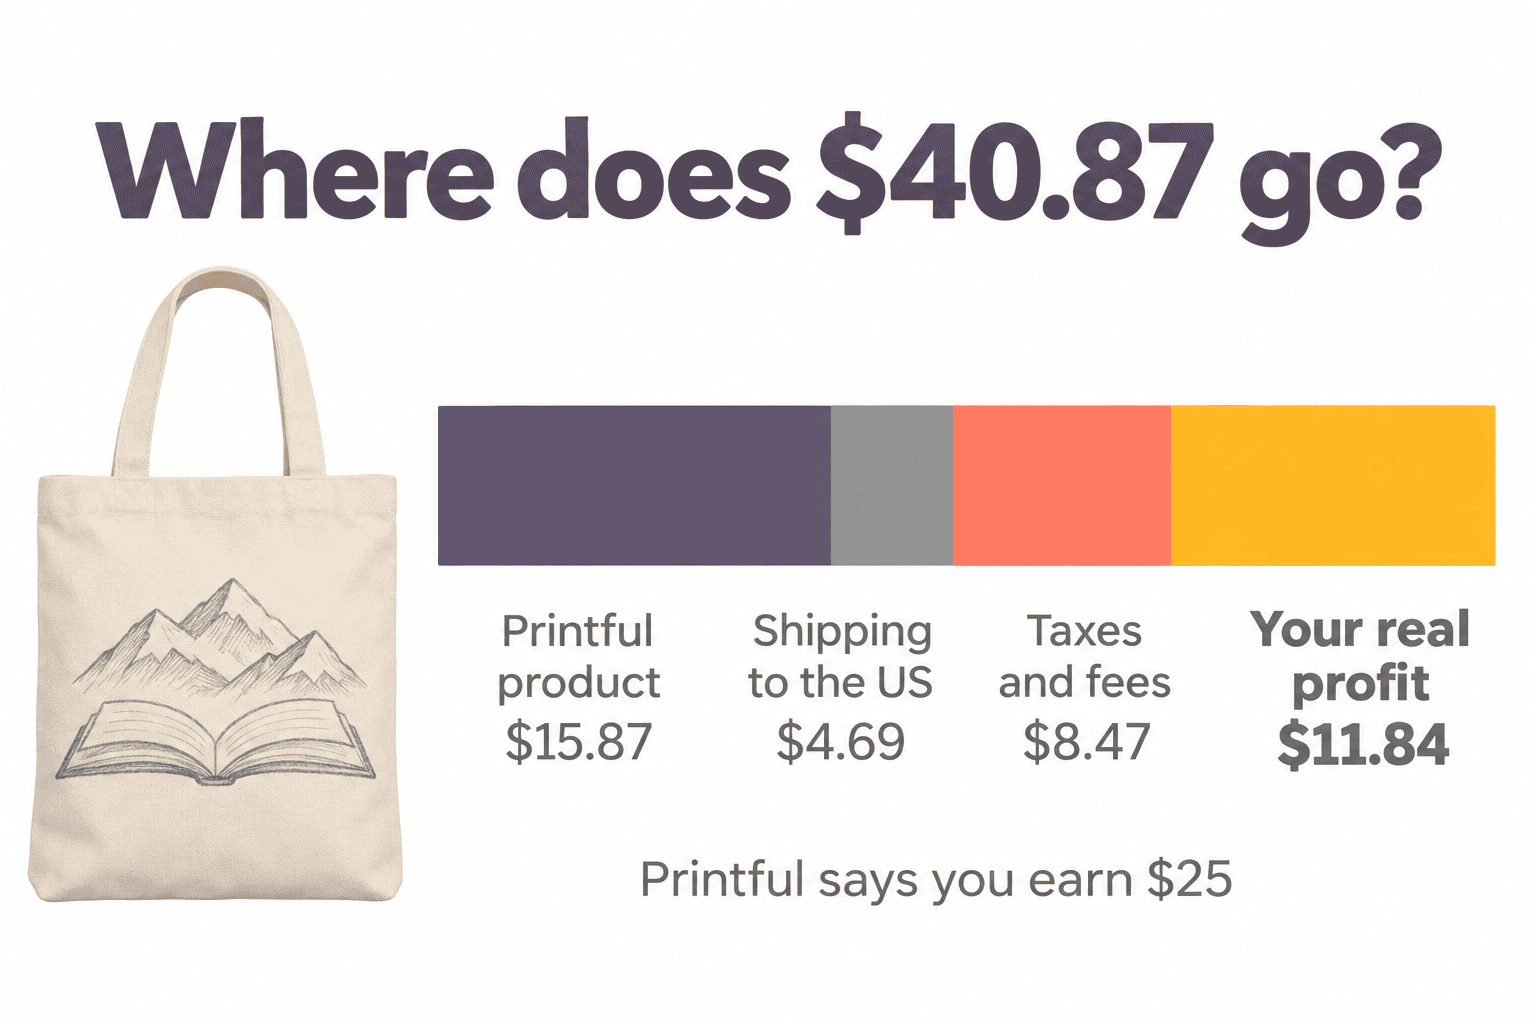
On the pricing page I increased the price by $25 and clicked Set. The bag became $40.87, and Printful said I’d earn $25.
But Printful’s number doesn’t count shipping, taxes or payment fees. On the product’s Shipping tab, shipping to the US was $4.69, and to Israel, an expensive country to ship to, $12.49.
When I put the numbers into my free Printful profit calculator (price $40.87, product $15.87, US shipping $4.69, plus taxes and payment fees), the real profit was only $11.84, not $25.
My honest opinion
Is $40 too much for a tote bag? That’s a good question. The more I work with Printful, the less sure I am that it pays, so I’m going to compare these prices with Printify too.
With Printful, I think it’s better not to give free shipping and to connect the shipping to your site, so product prices don’t get too high and customers see what they pay for shipping. But when I shop myself, I like free shipping, so I’m still not sure this is the right way.
Want to try it yourself? Try Printful here, and check your price in the profit calculator before you publish a product.
Some of the links in this post are affiliate links. If you sign up through them I may earn a small commission at no extra cost to you. I only recommend tools I use myself.