Printful Mockups Tutorial: Basic vs Custom Mockup Maker vs Canva
In this video I show all the ways I make mockups for my Printful products: Printful’s basic mockups, downloading them, the Custom Mockup Maker, and mockups in Canva. At the end I show how to give every shirt color its own image in WooCommerce, and which way I really recommend.
Basic mockups in Printful
I started from a t-shirt template with my Team Zoe design.
- Click Product templates in the left menu.
- Hover over the template and click Add to store, then choose your store. Mine is WooCommerce.
- Check the colors and sizes and click Proceed to mockups.
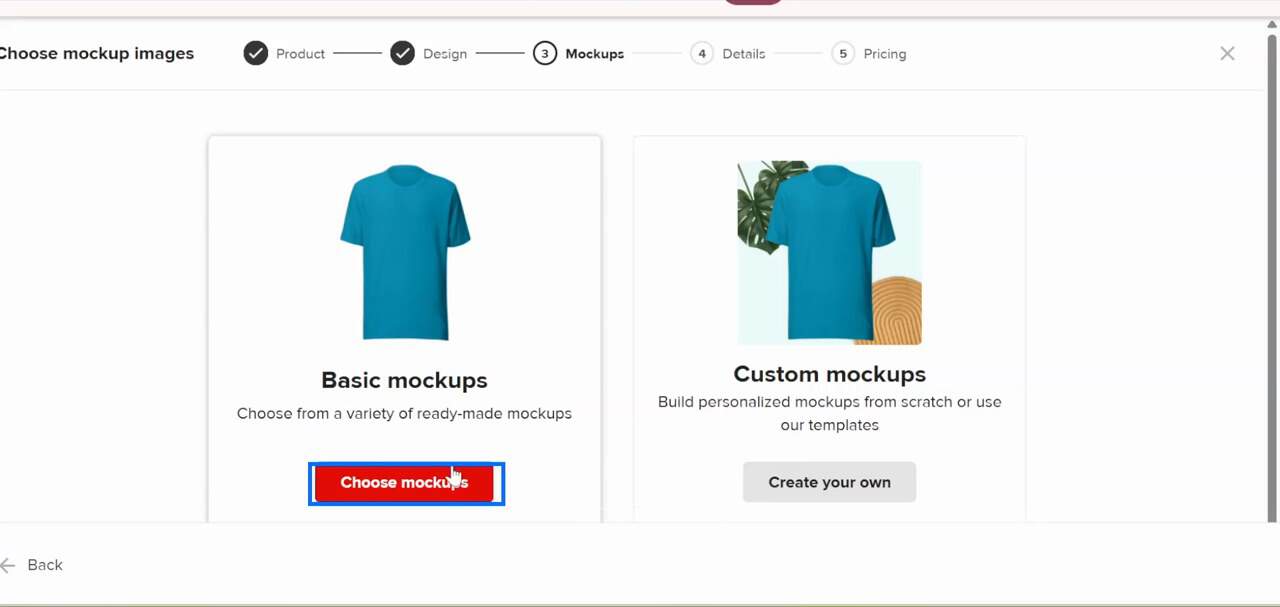
- Under Basic mockups, click Choose mockups.
- There are two tabs, Main Mockup and Additional. Click the mockups you want. Every click shows a preview on the right.
- The one with the star is the main image, the first image people see in your store. Then click Continue to get to the title and the description.
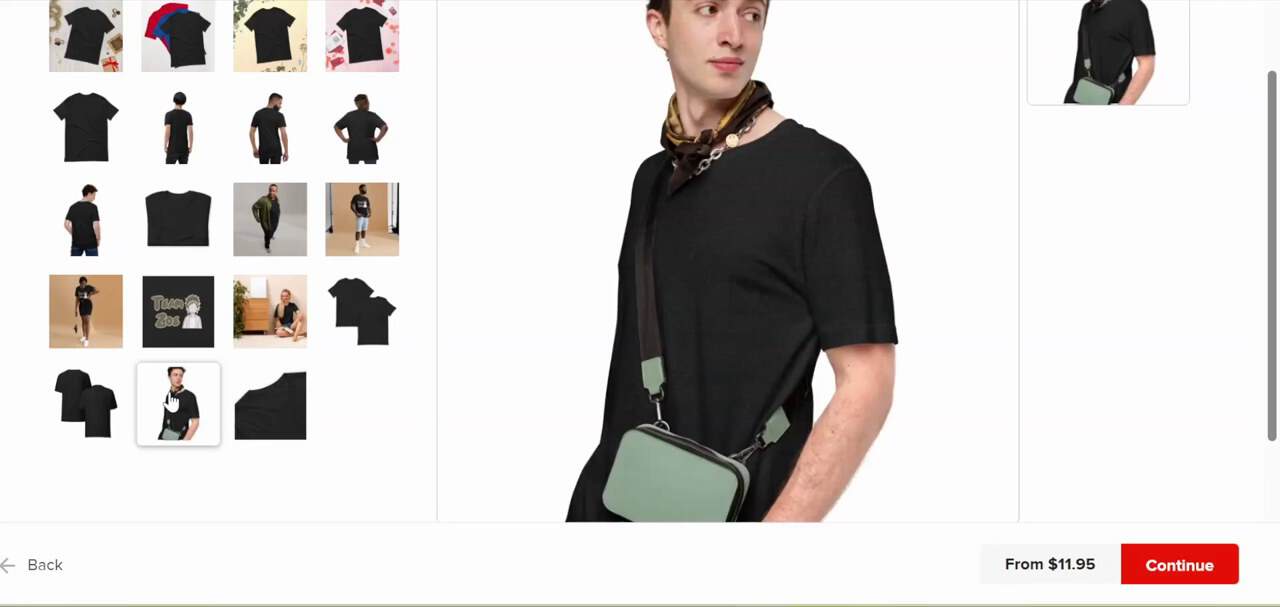
For a shirt, the basic mockups are really enough. There are a lot of them: flat, on models, with props and from different angles. And Printful makes them for every color, so if you sell the shirt in five colors, every color gets its own images without you doing anything.
But some products have only a few mockups, like my team hats. For products like that, it’s worth adding more mockups of your own directly in your WooCommerce store. I show how at the end of this post.
Downloading the Printful mockups
You can download the Printful mockups and use them anywhere: on social media, in ads, or as a base for your own mockup.
- Go to Stores and open the product.
- Click Download mockups and check the mockups you want.
- Check the sides you want: front, back, left or right.
- Under Mockup format, choose JPG (smaller, loads faster) or PNG (bigger, can have a transparent background), and click Download mockups.
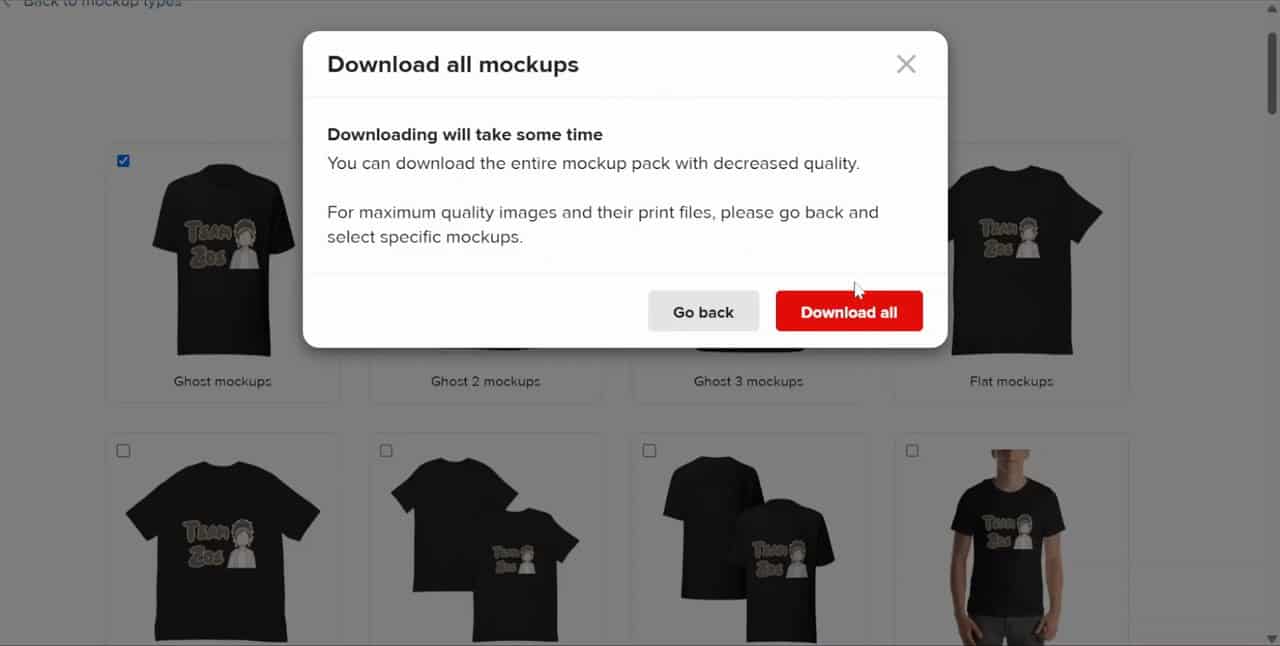
There’s also a button to download all of them, but read the message first: downloading everything gives you lower quality. For the best quality, choose only the mockups you need.
Printful’s Custom Mockup Maker
Under Custom mockups, click Create your own. Choose a scene to start with (you can change everything later) and click Select and continue.
- Layers: every shape is a layer, and the background is a layer too. Click a shape to move it, and drag a corner to resize it.
- Color: click Color at the top. Only some elements can change their color.
- Props: in the left bar there are groups like Kitchen and Food. I added bananas, just to show you.
- Background: click Change background fill, under the layers: Texture, Solid, Gradient or an image.
- Text: click Text in the left menu. At the top you have Color, Font, Arc to bend the text, Outline and Shadow.
- Pattern: repeats an element all over the mockup. On my half circle it didn’t look good, so I clicked the X to remove it.
- Mockup style: at the top left, under Choose mockup style, you can switch the flat shirt to a model: men, women, couples or a shirt on a hanger. How many options you get depends on the product. My puzzle has only one.
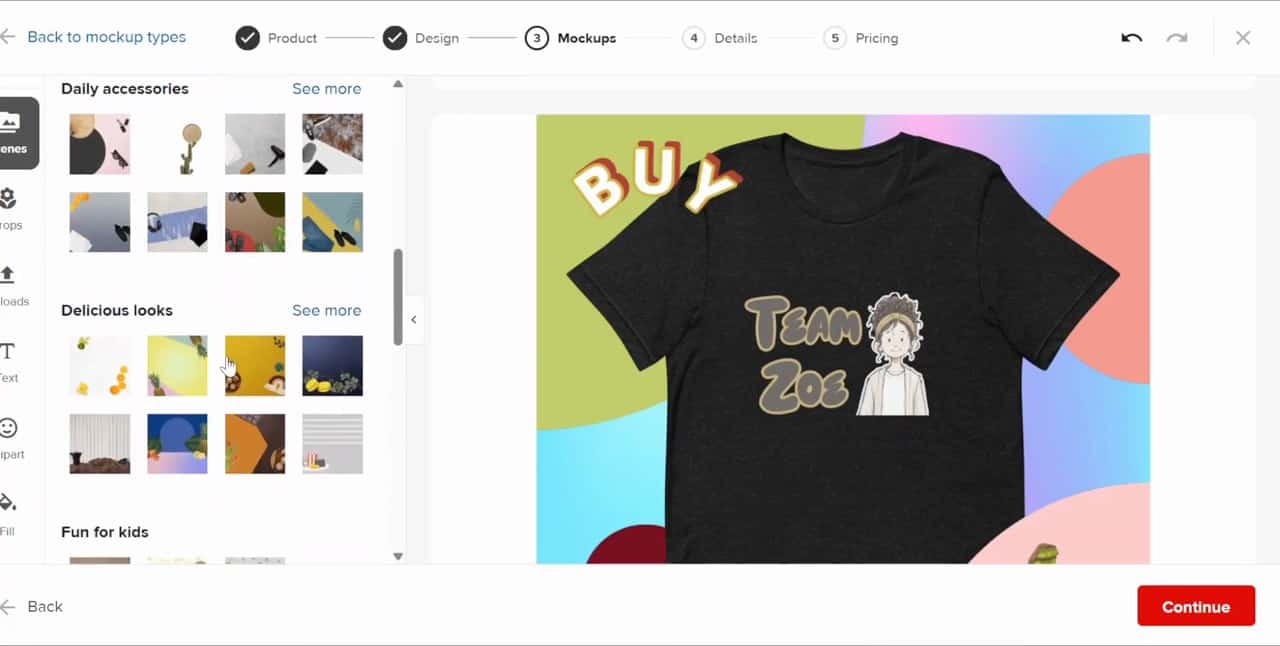
This one was only to show the options. My tips: don’t put text or any other element on the shirt itself, because people might think it’s part of the design. And don’t fill the mockup with too many things. A calm background keeps the attention on the product.
Now the big difference. When you click Continue, look at the mockups that will be displayed in your store. With basic mockups, the product gets a lot of images from different angles. With a custom mockup, you get only the one mockup you made. Printful changes the shirt color in it, but it’s still the same single image, with no other angle to see.
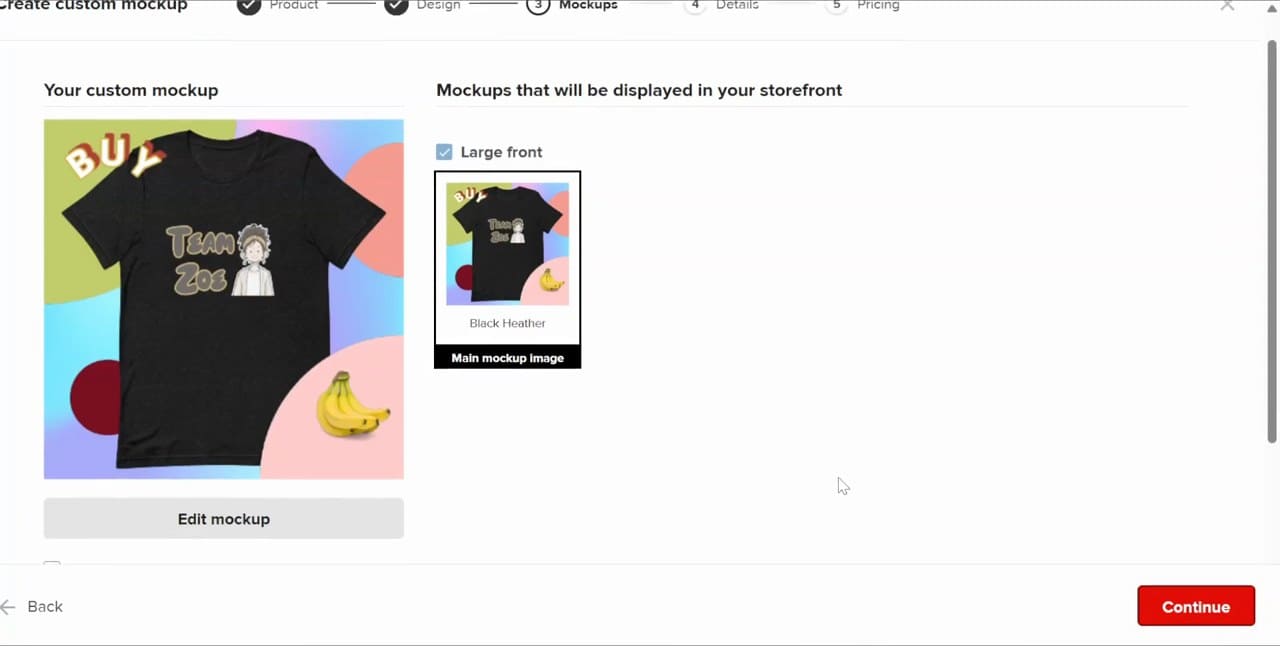
Choose JPG or PNG. You can also check Save this mockup as a new scene to use it again on other products. Then click Continue, check the title, the description and the price, and click Submit to store.
A Printful mockup as a base in Canva
Here’s a nice trick: use the Printful mockup you downloaded inside Canva. The shirt stays exactly the right Printful shirt, and you design everything around it.
- Click Uploads in the left bar, then Upload files, and add the mockup. Make it bigger with the corner.
- Click Elements, search for “background”, open the Photos tab and choose one.
- Right-click it and choose Set image as background.
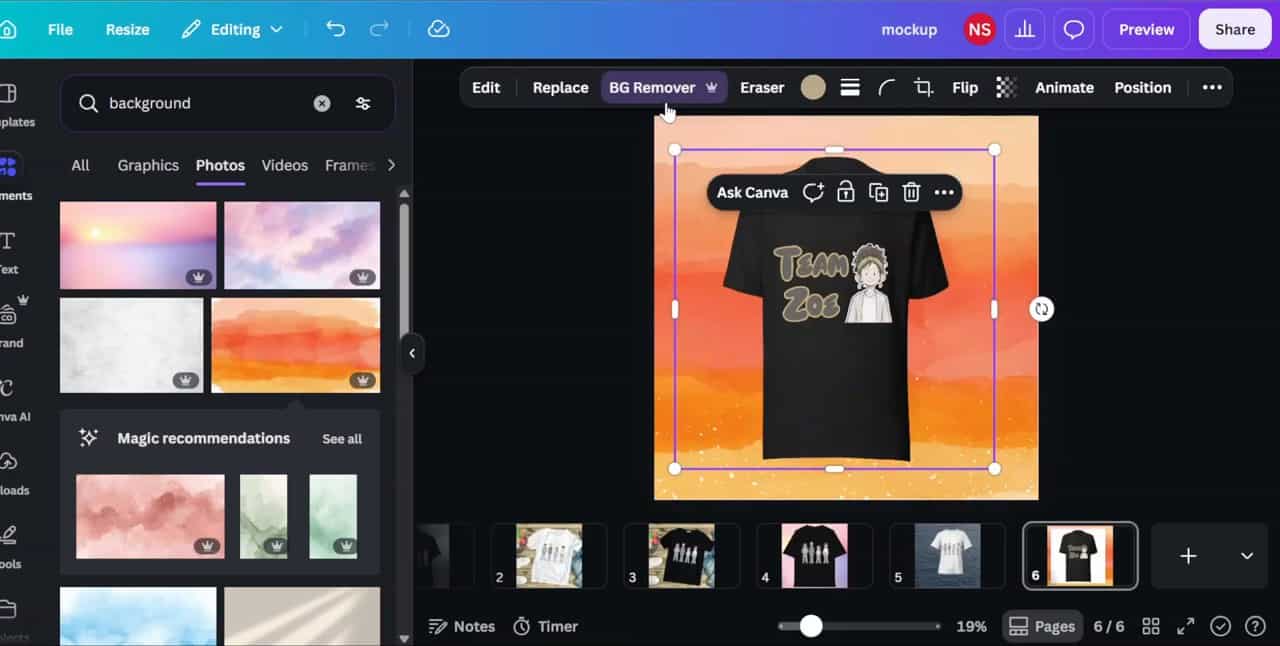
- Click the shirt and click BG Remover at the top, so the shirt sits on the new background.
Ready mockups in Canva
- On the Canva home page, click Create a design, then Custom size. I used 2000 x 2000 pixels.
- Click Elements and search for “mockup for shirt”.
- The ready mockups come with an example design on them. Click it and delete it.
- Click Uploads, upload your design and drag it onto the shirt. Set the size with the corners.
- If the shirt lies at an angle, turn your design with the round arrow under the image until it matches the shirt.
Another color with AI: I duplicated the page (three dots on the page, Duplicate page), clicked the photo, then Edit and Magic Edit. I wrote “Make the tshirt black” and clicked Generate, and the white shirt turned black.
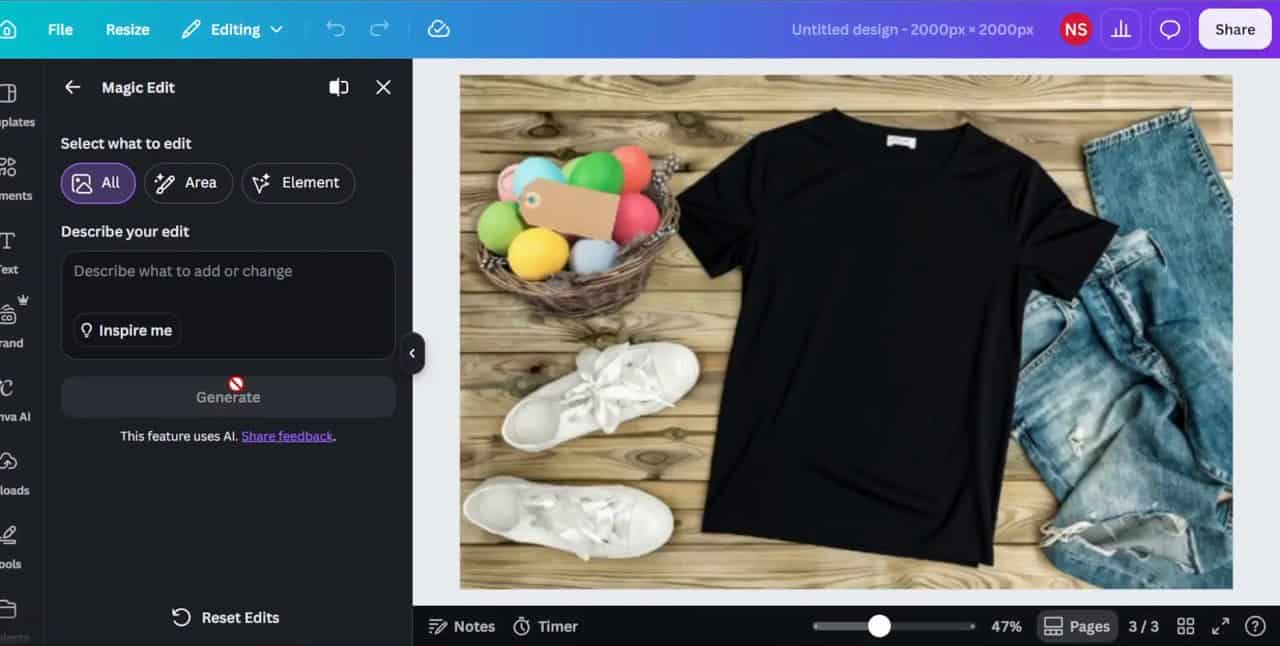
A plain shirt: search for “t shirt” and choose a shirt from Graphics. Change its color at the top, add your design, center it with Position → Center, and set a photo as the background.
Video mockups: Canva also has moving mockups. Drag your design onto the shirt (I used Edit → Smart Crop to make it fit), add a video background and download it as MP4. It’s great for social media and ads, but Printful doesn’t accept video, so for Printful you need an image.
Adding a Canva mockup to a Printful product
I needed a Printful product that looks like the shirt in my Canva photo, so I chose the Men’s Oversized Faded T-Shirt, in Faded Black and Faded White only. Every color you add needs a mockup in the same color.
- Save it to templates, click Add to store and choose WooCommerce.
- Click Proceed to mockups, then under Custom mockups, Create your own. Choose any scene and click Select and continue.
- I changed the background to plain white and deleted the square layer.
- In Canva, download the page as PNG. In Printful, click Uploads → Upload, choose the PNG and click Apply.
- It comes in small. Drag the corner until it covers the Printful shirt completely.
Now look at the mockups for your store: Printful shows the same white shirt on both colors, also on the black one. When you upload your own image, Printful treats it like a background. With a real Printful shirt it changes the shirt color, but your own image stays the same for every color.
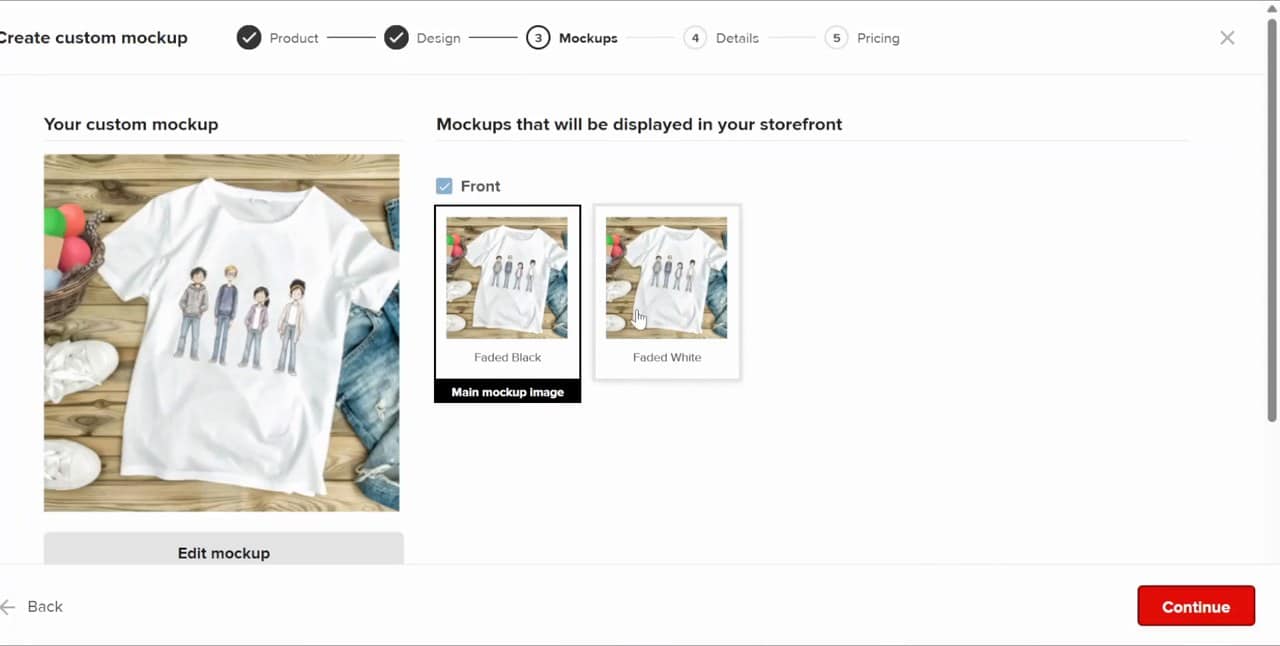
A different image for each color in WooCommerce
To fix the black shirt, I downloaded the black shirt from Canva the same way, and added it in WordPress:
- Click Products and open the product.
- Under Product gallery, click Add product gallery images, upload the black shirt and click Add to gallery.
- Scroll down to Product data and click Variations. Every color and size is a variation.
- Open a Faded Black variation, click its image, click Replace, choose the black shirt and click Use this image. Do this for every Faded Black size.
- Click Save changes, and Update at the top.
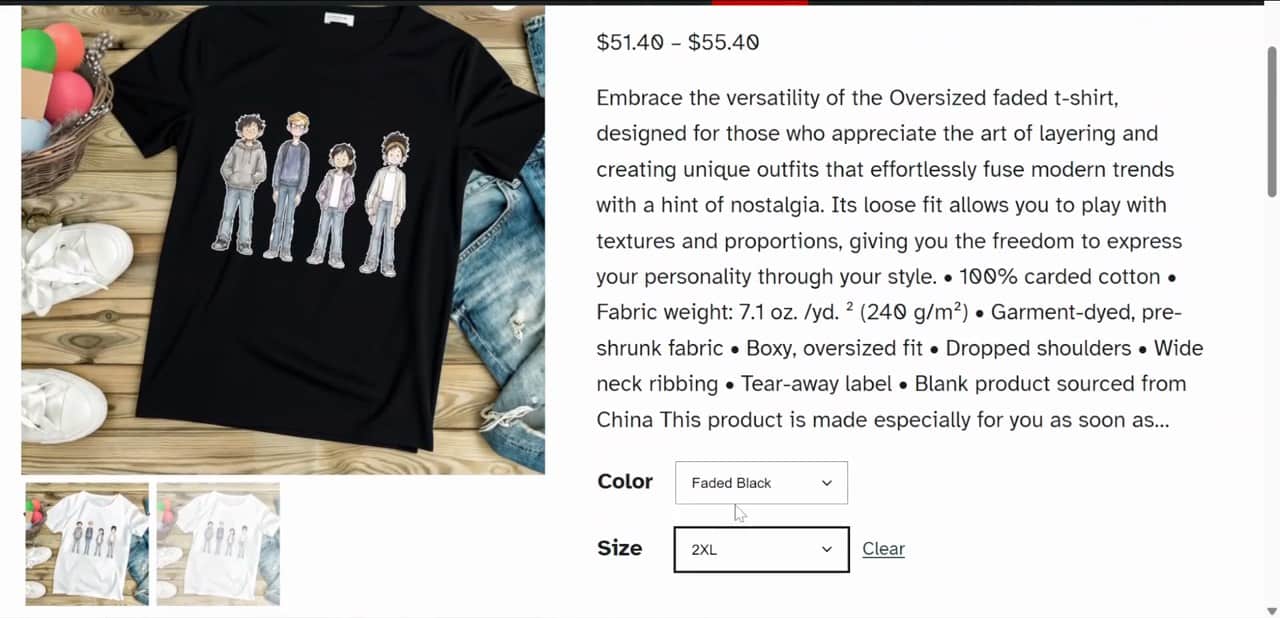
Now when someone chooses Faded Black on the product page, the main image changes to the black shirt, and with Faded White it changes back. Look for a mockup that’s close enough to your real product: the black in my Canva photo isn’t really the same as the faded black shirt.
What I recommend
For a product that has a lot of mockups, use the basic mockups from Printful. Your store gets a lot more images, in every color and from every angle. A custom mockup gives you only the one image you made. Then, on your site, add your own mockup from Canva as the main image. This way your store looks great, and you still have all the angles.
Try Printful here, and before you set a price, check what you really earn in my free Printful profit calculator.
Making more Printful products? Keep the print size, costs, real profit and links of every product in one place with my free Printful product checklist and notes.
Some of the links in this post are affiliate links. If you sign up through them I may earn a small commission at no extra cost to you. I only recommend tools I use myself.